
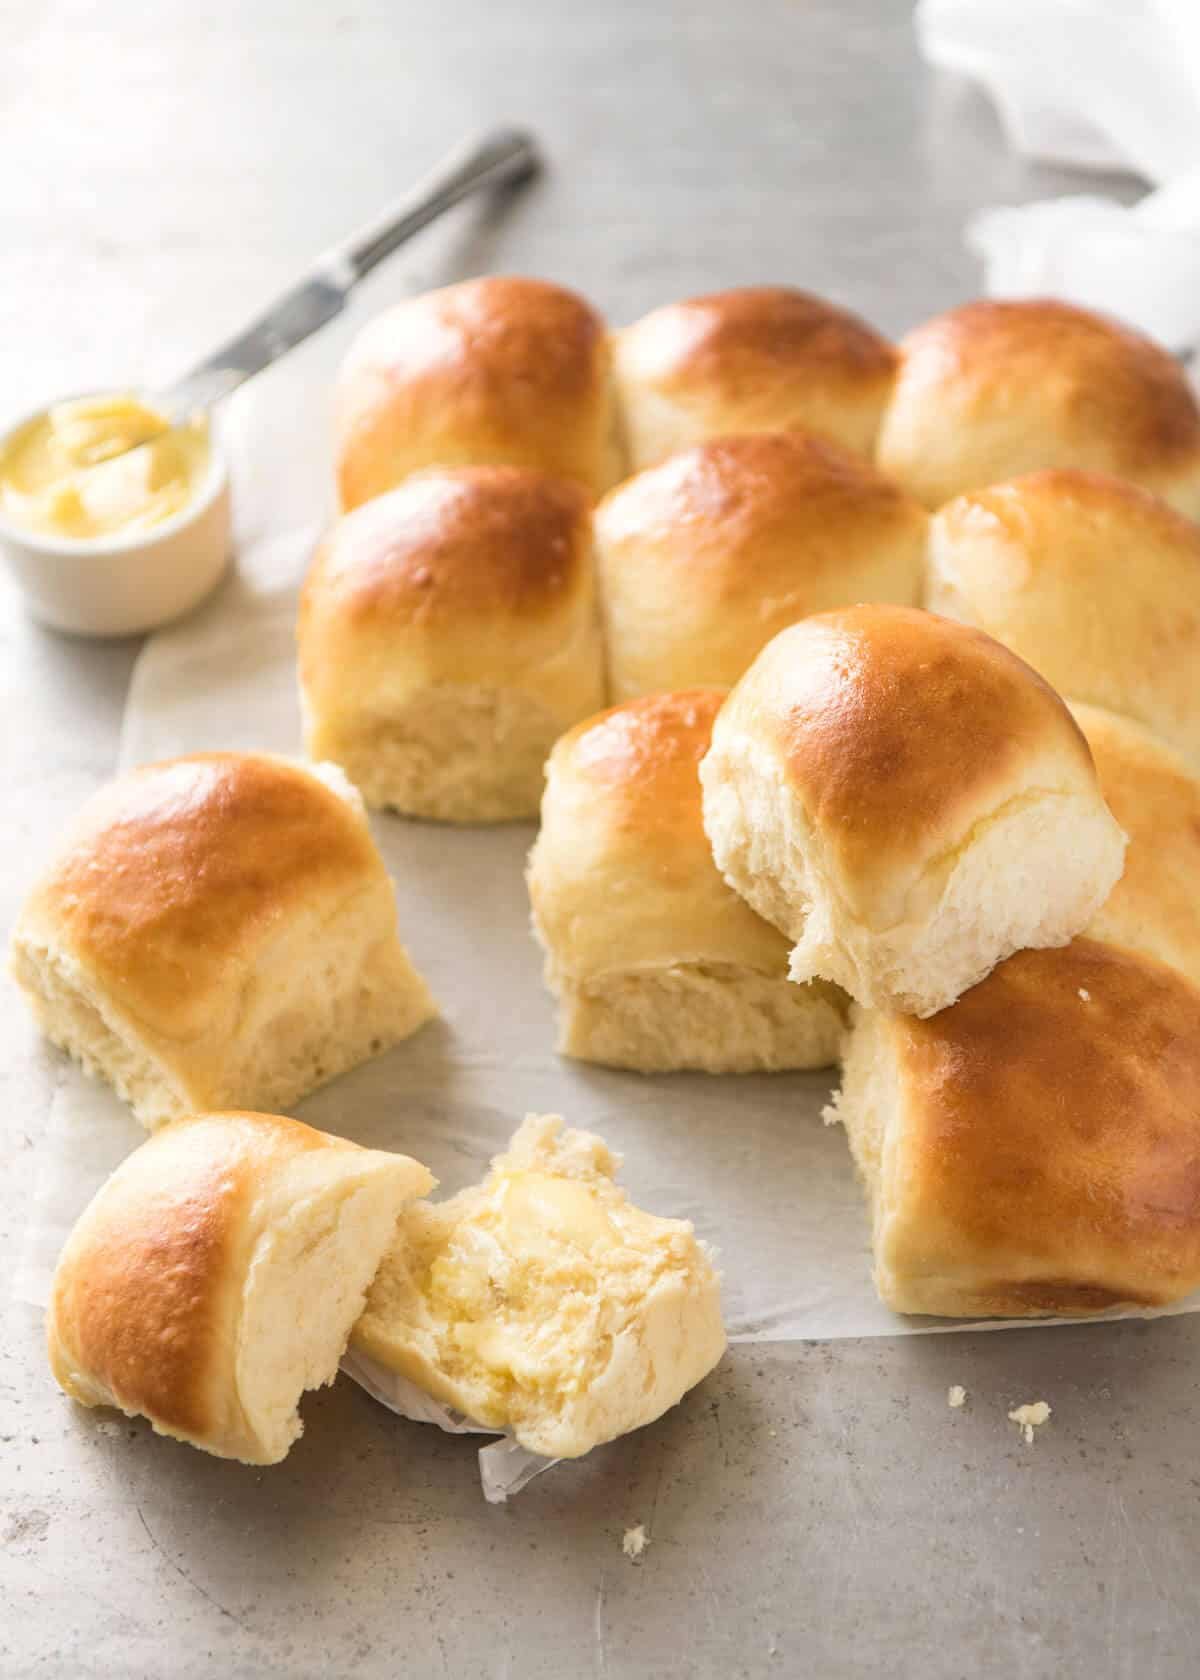
No stand mixer, no knead, no special equipment required. These No Knead Dinner Rolls are perfectly soft and fluffy and are astonishingly effortless to make. Just combine the ingredients in a bowl and mix with a wooden spoon – that’s it! It’s the easiest recipe for bread rolls in the whole world!
This recipe for bread rolls will blow your mind!
These dinner rolls are:
made without kneading;
without a stand mixer or any other electric appliance;
take 2 minutes of active effort to mix the dough;
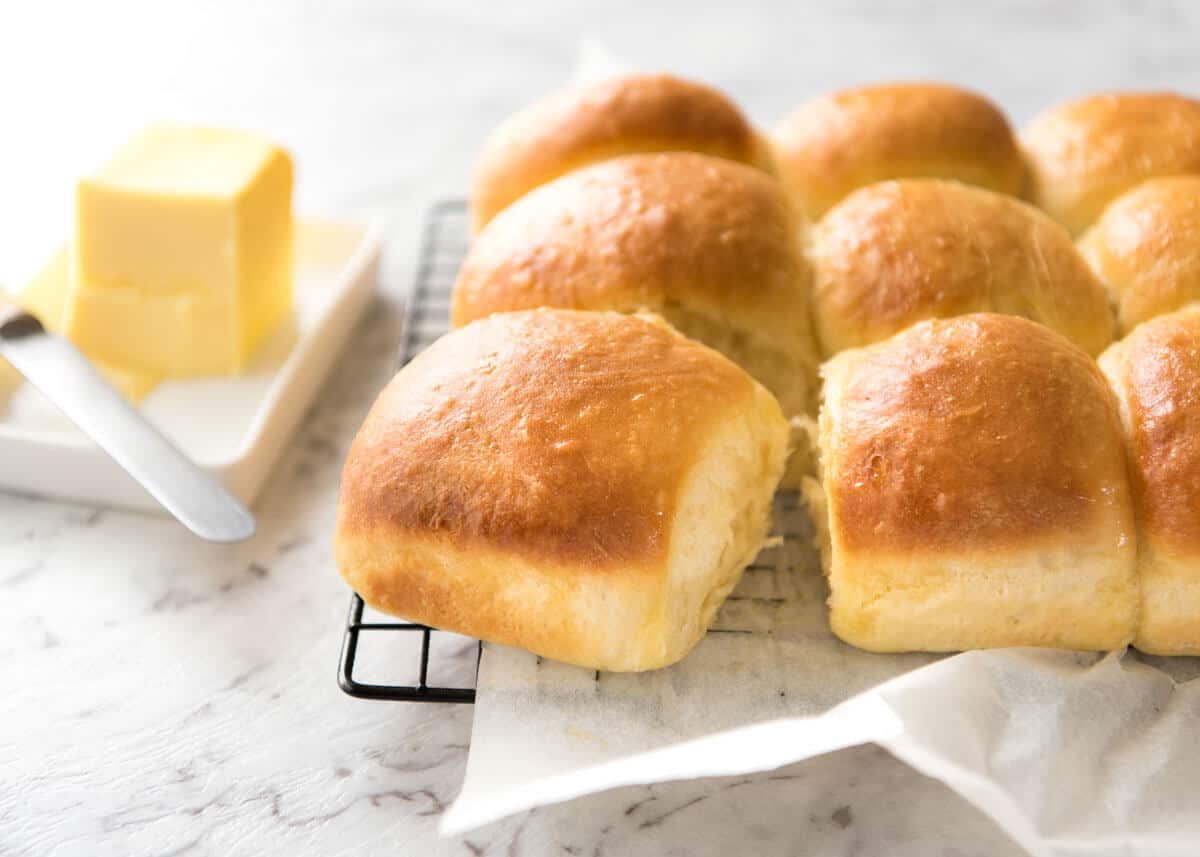
have golden tops and are soft and fluffy on the inside.
Every single time I make these, I am in utter awe of how effortless they are, and how amazing they taste. They are in every way just as good as classic dinner rolls, made by kneading the dough by hand (tired arms, tired arms!) or using a stand mixer.
I truly believe to my very core that only those with a refined palette and/or baking experts can tell the difference between these No Knead Dinner Rolls and traditional kneaded-tired-arms dinner rolls!
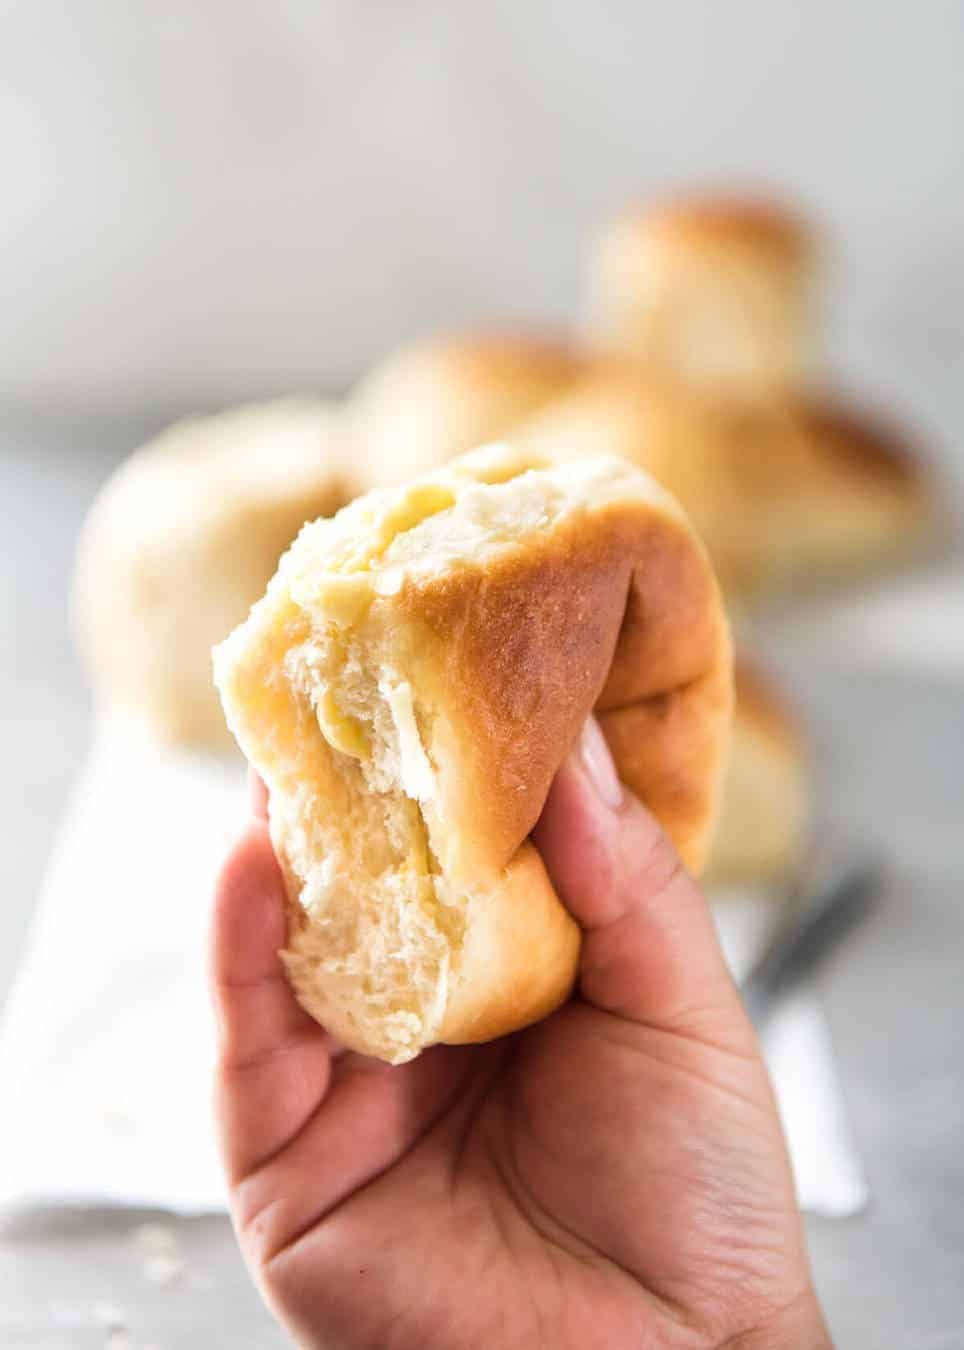
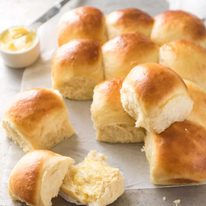
See how soft and fluffy they are??
Kneaded vs No Knead Dinner Rolls
In the interest of being completely open and honest, here are the differences that I notice between kneaded dinner rolls and these No Knead Dinner Rolls:
The kneaded rolls stay a wee bit more moist for longer. ie. they are slightly better the next day compared to the No Knead ones. But actually, homemade bread, muffins etc, being preservative free that they are, are always best consumed fresh so I don’t see this as a major disadvantage. Neither the kneaded nor No Knead rolls are great the next day. They lose their moisture and both need to be warmed up before serving to make them moist again. It is just that with the kneaded ones you could possibly get away with not warming up (but they aren’t great), whereas the No Knead ones definitely need warming up;
Kneaded rolls rise a wee bit more. Not noticeable for normal people, and you’d never say the No Knead ones aren’t soft and fluffy. They are, they really are. It’s just that the kneaded ones rise a touch more with the same amount of yeast.
I’m so convinced of the merits of no-knead breads however, that I have since posted No-knead Artisan Bread and Focaccia – both spectacular loaves in their own right that don’t require single minute of kneading!
Dump-and-mix NO KNEAD Dough
In terms of the prep, the batter is literally a dump-and-mix job. There is a major difference in rise time compared to kneaded dough which can rise in 30 – 45 minutes for the 1st rise, then around the same for the 2nd rise after forming the rolls. For these No Knead Dinner Rolls, the dough is much wetter than kneaded dough, so it takes longer to rise. 1.5 – 2 hours, depending on how warm it is where you are. If you use my ridiculous-but-effective tip of rising the dough in your (empty! warm!) dryer, it takes 1.5 hours. 🙂 (See recipes notes for details)
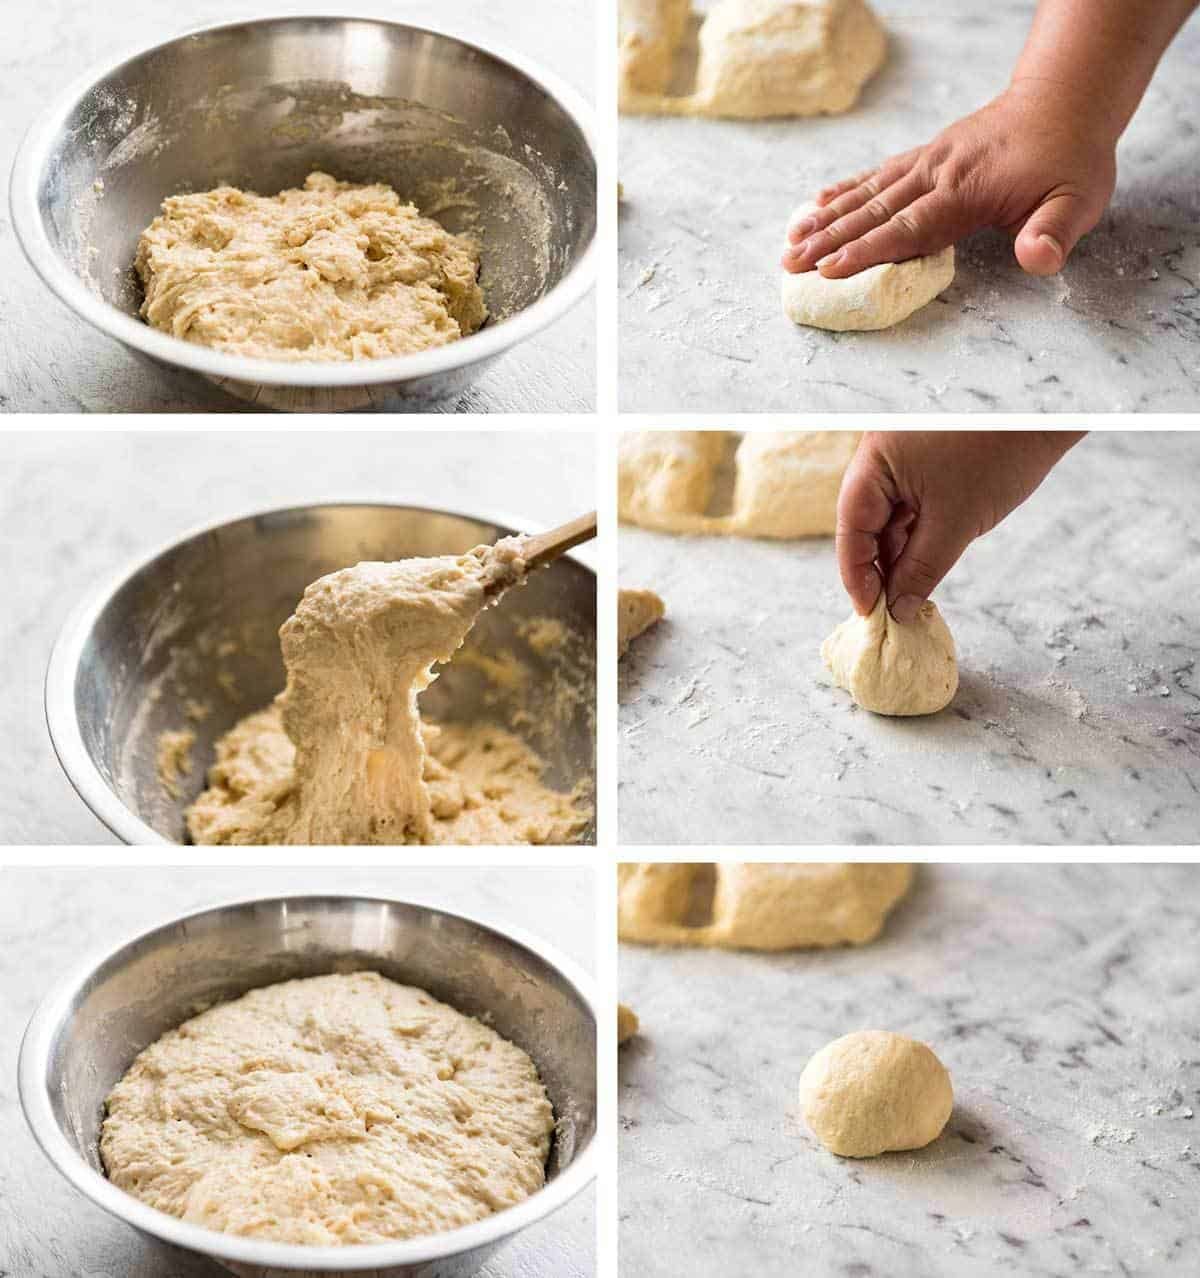
You can see in these photos how different the dough is compared to traditional bread dough. It’s not knead-able, it’s way too sticky. It’s almost more like a muffin batter!
Quick little tip: To get a beautiful golden surface, the dough needs to be rolled tightly and smoothly into balls. With sticky dough, this is tough to do. So here’s my work around: Press the dough down lightly, then bundle it up like a money-bag (mmm…Thai Money Bags…). Flip it over and you have a nice smooth surface with the dough stretched tightly = smooth golden surface. I demo this in the recipe video too (below recipe).
Make-ahead and bake on demand
Another big bonus for these rolls: you can roll the dough into rolls then refrigerate overnight (uncooked) and bake them fresh when you’re ready to serve! It’s quite amazing actually, I wasn’t sure it would work but it does.
Easter is coming up! That’s why I decided to squeeze these in so soon after sharing Hot Cross Buns (which you can make using this No Knead technique, the recipe is in that post). I know some people think baking with yeast is daunting. But I swear to you, watch the video. See how soft and irresistible these rolls come out. And be prepared to be blown away by how easy these are to make!
Carb Monsters unite! – Nagi xx
More No Knead Breads & Flavour variation options!
Cheese and Bacon Rolls (use this no knead dough for that recipe)
WATCH HOW TO MAKE IT
No Knead Dinner Rolls recipe video! No laughing at the Baby Hands – you’ll cop a serious eyeful in this video!
Hungry for more? Subscribe to my newsletter and follow along on Facebook, Pinterest and Instagram for all of the latest updates.
SOFT NO KNEAD Dinner Rolls
Ingredients
Buns:
- 1 tbsp dry yeast (Note 1)
- 1/4 cup caster/superfine sugar , or sub with normal white sugar
- 1/2 cup warm water (Note 2)
- 4 cups bread flour + extra for dusting (Note 3)
- 1 1/2 tsp salt , cooking/kosher salt
- 1 cup milk, lukewarm, whole or low fat, (Note 2)
- 50g / 3 1/2 tbsp unsalted butter , melted and cooled
- 2 eggs , at room temperature, beaten with fork
Brushing:
- 1 tbsp butter , melted
Instructions
- Place the yeast and 2 teaspoons of the sugar in a medium bowl, then pour in water. Leave for 5 minutes until it froths.
- Place flour, remaining sugar and salt in a bowl. Mix to combine.
- Make a well in the centre. Add milk, butter, eggs and pour in the yeast liquid, including all froth.
- Mix until combined with wooden spoon – it will be like a thick muffin batter. Not pourable, but thick and sticky.
Rise #1:
- Leave dough in the bowl, cover with a wet (clean) tea towel and place in a warm place (25C/77F+) to rise for around 1 1/2 – 2 hours or until almost tripled in volume. See Note 4 for how I do this (you will laugh – but it works every time!). Dough surface should be bubbly (see video or photos in post).
Forming Balls (watch video, it’s helpful):
- Line a 31.5 x 23.5 cm / 9 x 13″ tray with baking paper with overhang.
- Remove tea towel and punch dough to deflate, then mix briefly in the bowl to get rid of the bubbles in the dough.
- Dust work surface with flour, scrape dough on work surface. Dust top of dough then shape into a log. Cut log into 4 pieces, then cut each piece into 3 pieces (12 in total).
- Take one piece and press down with palm, then use your fingers to gather into a ball, flip (so smooth side is up) then roll the dough briefly to form a ball. This stretches the dough on one side and that’s how I get a nice smooth surface on my roll. (For this step, use as much flour as needed to handle dough and avoid piercing inside into the wet dough)
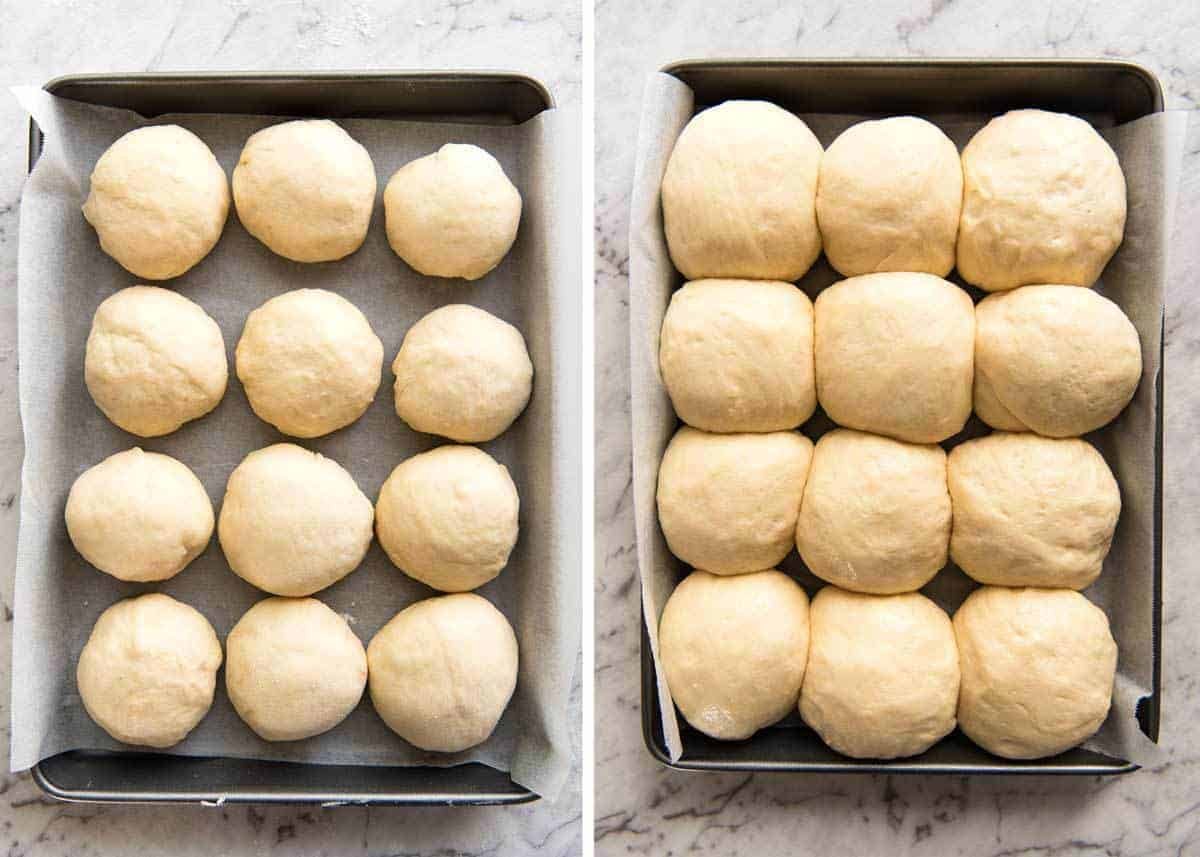
- Place the ball with the smooth side up on the tray. Repeat with remaining dough. Line them up 3 x 4.
Rise # 2:
- Spray surface of rolls (or cling wrap) with oil (any), then place cling wrap over the tray.
- Return tray to warm place and leave for 30 – 45 min, until the dough has risen by about 75% (less than double in size).
- Partway through Rise #2, preheat oven to 200C/390F (standard) or 180C/350F (fan/convection).
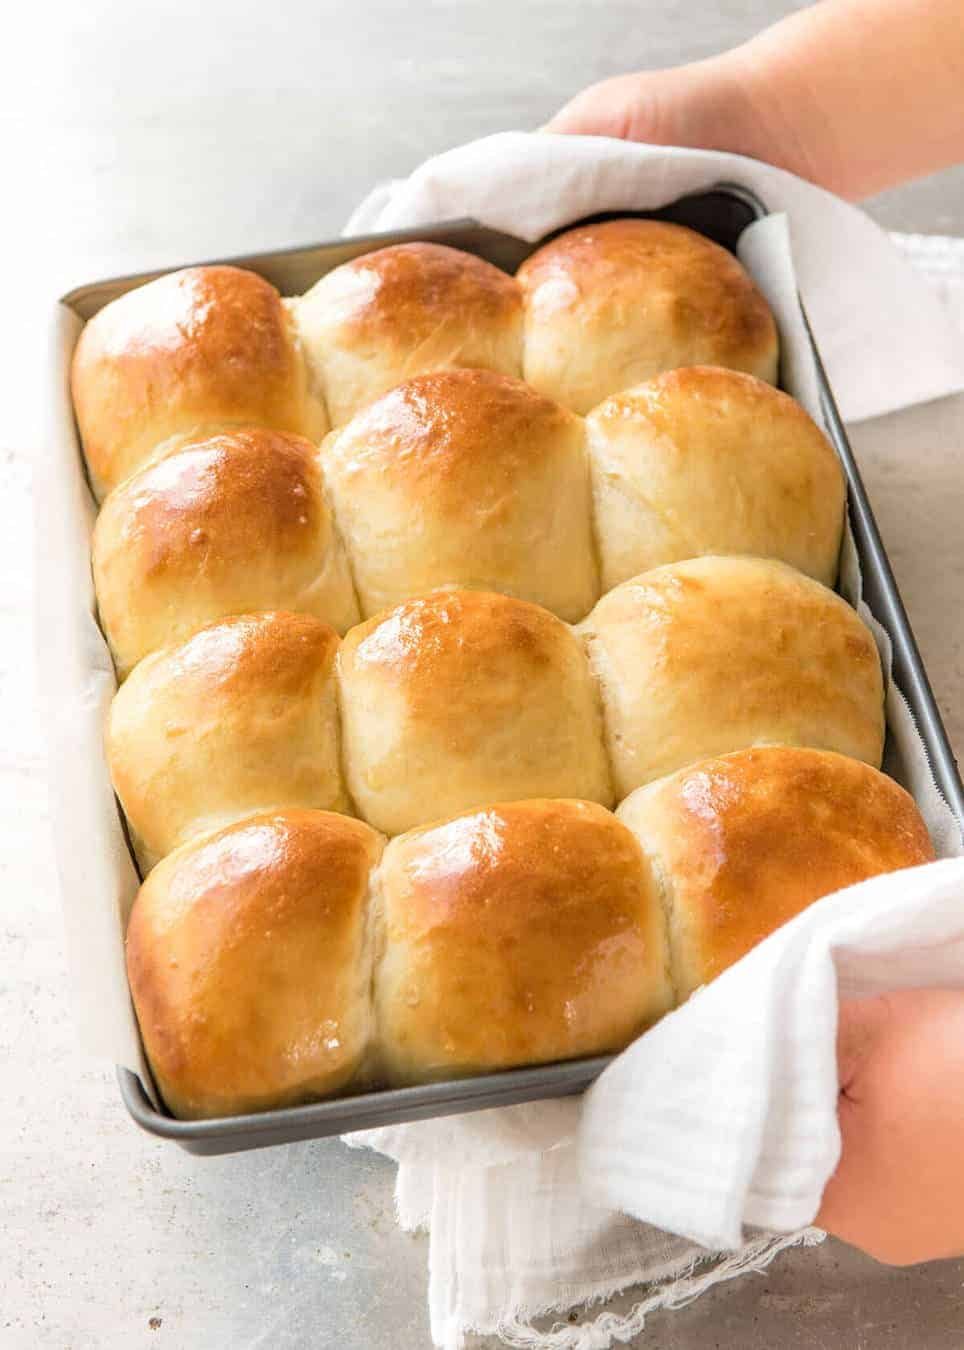
- Bake for 15 – 18 minutes, or until the surface is a golden brown and the roll in the centre sounds hollow when tapped. The surface colour is the best test for this recipe.
- Remove rolls from oven. Brush with melted butter.
- Use overhang to lift rolls onto a cooling rack. Allow to cool to warm before serving.
Recipe Notes:
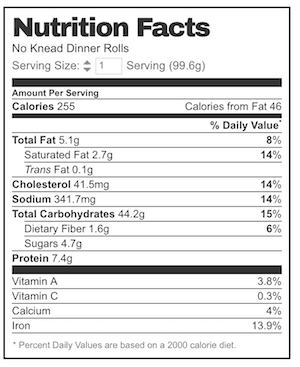
Nutrition Information:
LIFE OF DOZER
When he got sent to the naughty corner and he was wondering whether he was allowed back in….

never have I ever, ever, been able to make dinner rolls that looked good and tasted good. these are TRULY no fail and easy. My family loves them. and I’ve made them over and over!!!
My husband love it. Came out perfect everytime. 😍
I made these yesterday and heated some up this morning. Mine were HUGE but I ran some errands while they were proofing on the counter. I think the warm, wet tea towel was a great way to proof them. (I maybe left them to proof too long). These were great and looked store bought. I cook mine in a cast iron skillet so I did a little longer in the oven. I didn’t think these were as super sweet as some other no knead yeast rolls I’ve made. Thanks!
Everything you could possibly want in a dinner roll. My whole family loved them from the time they walked in and smelled fresh rolls to devouring them. I love a yeasty bread and surprisingly they didn’t taste sweet, which we all loved. My 14 yr old granddaughter asked if they were made with beer. Lol, I worry about that kid 🤣. I did the make ahead option making fresh from the oven rolls doable at any meal.
These looked and felt great but the mouth texture and taste wasn’t what I was after. The crumb wasn’t smooth and fine enough for me. Easy to make though….
Can I leave the sugar out?
Sam – in breadmaking sugar provides several functions besides just sweetening. It greatly softens the bread texture (important in dinner rolls like these) and improves its keeping properties as well (as does fat content). You don’t actually need sugar to ‘activate’ or feed the yeast, but it is there in bread recipes for these other reasons.
My 6 year old made this herself, my job was just to supervise, prepare the ingredients, and help with the hot air fryer. Absolutely marvellous and fluffy too! Our first attempt at baking and it turned out awesome. The extras will be packed for school lunch box tomorrow. Thanks Nagi x
We love these rolls! I serve it for thanksgiving and they are better than the rolls I buy from restaurants. I freeze some of them and they are still soft and fluffy after reheating. This is a recipe to keep.
Thank you so much for this recipe! I made them for Thanksgiving and they were a hit! Absolutely delicious! I’ve already been asked to make them again for Christmas, so I am definitely saving this recipe as my go-to for dinner rolls. Thank you again!
The best roll recipe ever!!❤️❤️
I just made these for thanksgiving and oh my gosh! I have found my roll recipe for the holidays. I made the dough in the morning, first rise made the balls and put them in the pan and refrigerated til the meal was almost done. Took it out 30 minutes and then baked. They were beautiful and tasted amazing. Thank you yet again Nagi! You completely nailed this recipe again
I made these and they’re amazing, so tall and soft and fluffy. I have to ask though if you’re tested the metric conversion. I had to add quite a bit more flour to reach the consistency of your video (and I was glad to have that reference). I’m just wondering if you usually make it with the imperial measurements so the conversion isn’t accurate to the amount of flour you actually use.
Thanks!
I love making these rolls, and everyone loves eating them. It’s such an easy recipe that they turn out perfect even when you make slight errors in measuring; it’s a perfect bread recipe for anyone who’s just trying their hand at baking bread from scratch. And at least in my area of the US, the baked rolls do save very well in airtight containers.
My favorite modification to this recipe: instead of separating the dough into twelve balls, I separate it into twenty four. The rolls still turn out plenty big, but they go twice as far without doubling the recipe, making it even more perfect for things like Thanksgiving and potlucks. (Still use a 9×13 pan, no changes to rising or baking time.)
If you make these the day before but do not bake, do you let the rolled rolls rise first, then refrigerate overnight, and pull them out of the fridge 30 mins before baking?
Valerie, do the first rise and then put in the fridge. When you take them out of the fridge let them rise again and then bake.
Want to make these the day before and refrigerate. I watched the video and it says let the rolled rolls rise 30-45 minutes before baking so do I let them rise and then refrigerate overnight? That’s my plan anyway.
This absolutely the easiest roll recipe I’ve tried. The rolls turned out beautifully and tasted even better. My sister even commented that they were magazine worthy.
Love them but just a bit sweet for me can I leave out most of the sugar 😬
I found this recipe back around 2020. I made them and everyone loved them. I wrote the recipe down so I’d never lose it. Then, we had a house fire in January of 2021. We lost everything, including this recipe. I just found it today, didn’t realize it was the same one until they came out of the oven and everyone took a bite. Needless to say, they will be made more often. Super simple, amazingly soft, buttery, and they almost melt in your mouth!!! Thank you.
Absolutely fabulous rolls! It’s a keeper, I’ll be making again.
Absolutely the best and easiest bread rolls I ever made.