
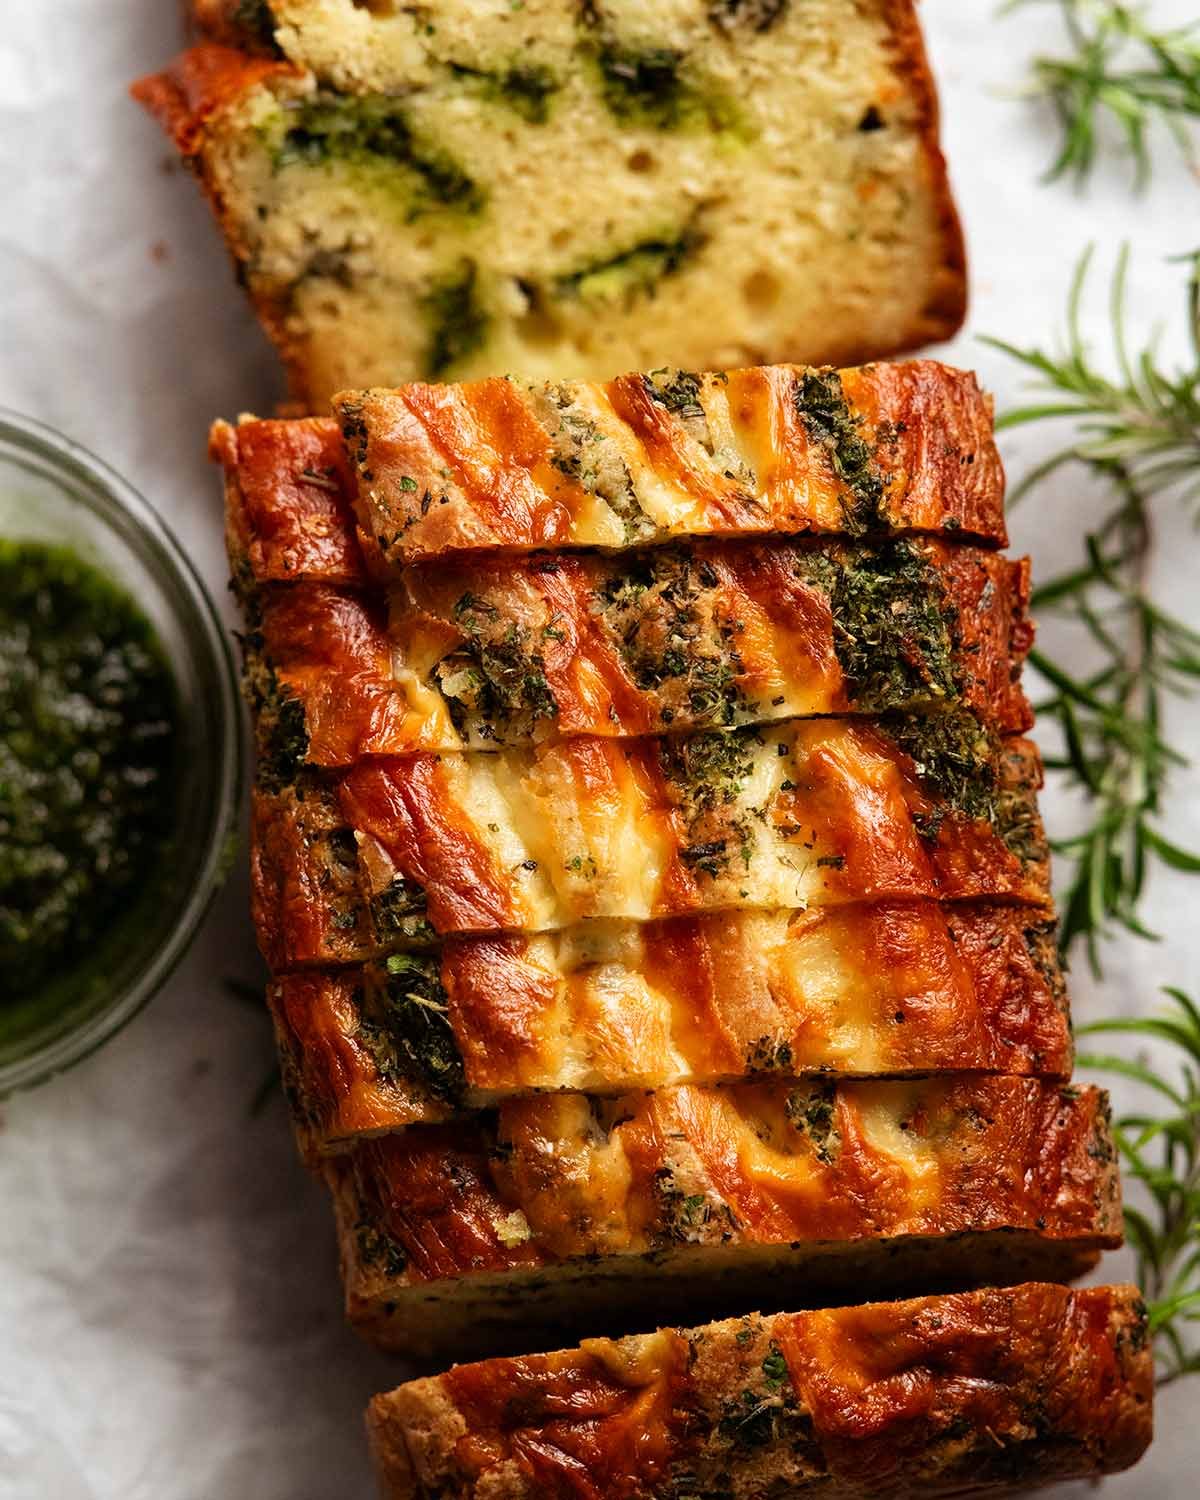
This is a bread loaf that, true to its name, is quick to make because there’s no yeast, no kneading, no rising. It’s a Cheese, Herb and Garlic Quick Bread with swirls of herbs and ribbons of melted cheese. Excellent for afternoon tea or dipping into soups!
A terrific no yeast bread recipe
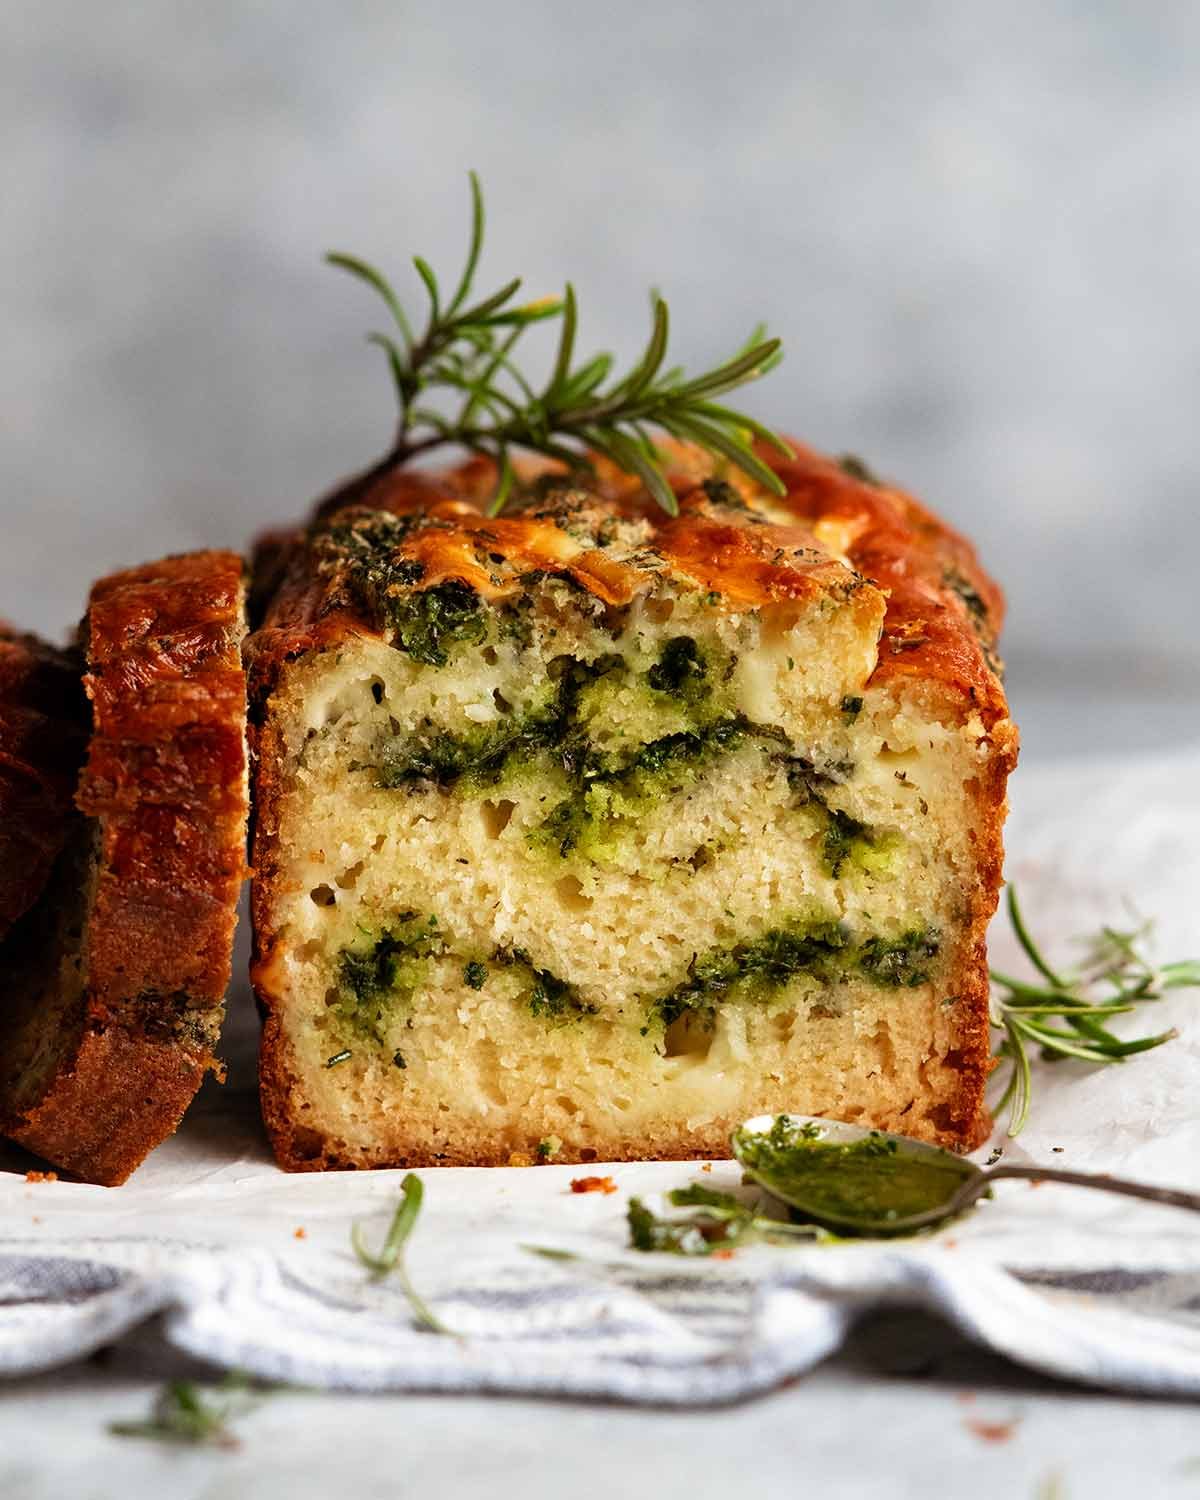
This is one of those recipes that isn’t actually a bread in the traditional sense, it’s a muffin batter baked in a loaf pan. So it doesn’t have that chew you get with proper yeast bread, but it’s irresistible in its own right, with a soft fluffy crumb loaded with garlicky, herby goodness and cheesy ribbons running through every slice.
But the best part is possibly that you’re already eating it while all those yeast-bread-making-people are still waiting for their dough to rise! 😈
I first shared this in 2015, but over time I tweaked it – mainly because the original recipe called for buttermilk which is not a fridge staple for me, and also to make the crumb softer and last longer. I’ve been enjoying this better version for a while… time to fess up and share!
Ingredients
Here’s what you need to make this:
Flavourings – cheese, herb and garlic
The cheese is cut into strips to bury in the batter, while the herbs, garlic and oil are used to make a “pesto” like mixture that is dolloped and swirled throughout. (PS Yes, you can totally use homemade or store-bought pesto!)

Cheese – I like to use cheddar, colby or tasty cheese (a type of cheddar popular here in Australia). However, you can use any melting cheese you want though I don’t recommend using mozzarella (flavour and salt too mild) or hard cheeses like parmesan, pecorino (too salty).
Fresh herbs – I love the combination of rosemary for earthy, herby flavour (and also because I have abundant supplies from the garden) and parsley for fresh green flavour. Rosemary is quite strong and for this loaf, I feel like using more than 2 tablespoons is too much.
Feel free to experiment with combinations you like! I originally used equal amounts of dill, thyme, rosemary and parsley, because I had remnants of these at the time.
Dried herbs – The ever reliable, always-on-hand combination of thyme and oregano! I used to just use fresh herbs but grew to prefer using both fresh and dried herbs in this particular loaf, for a mix of fresh and earthy herb flavour.
Garlic – Fresh, crushed with a garlic crusher or grated, so the flavour infuses better into the oil than finely chopping with a knife.
Olive oil – To bring the herb and garlic mixture together.
Salt – Brings out the flavours of the herbs.
Batter
The ingredients of this no yeast bread are similar to a muffin, but I altered the recipe to make it less crumbly, making it suitable to slice and even to toast. Here’s what you need.

Yogurt – A bakers’ trick to make crumbs moist and stay fresher for longer (this stays fresh in the pantry for 5 days!). Use any plain, unsweetened yogurt – regular or Greek – preferably full fat. Low fat does work but the crumb is a bit less plush.
Milk – Regular cow milk, full fat recommended though low fat can be used. (The yogurt plus milk essentially replaces the buttermilk that was in the original recipe).
Flour – plain / all purpose flour.
Baking soda / bi-carbonate – The leavening agent that makes this loaf rise. It’s stronger than baking power and makes this loaf rise better with a softer crumb. However, if you’re out, you can substitute with 3 1/2 teaspoons baking powder.
Eggs – Make sure you use large eggs which are 50-55g / 2oz each in the shell, sold in cartons labelled “large eggs”. If you only have jumbo or XL eggs, see this post for how to measure out the correct amount.
Butter and oil – The fat in this loaf. I use a combination because butter adds better flavour than oil, but oil makes the crumb of the loaf more moist, and keeps it fresher for longer.
Garlic – With garlic in both the herb garlic mix AND in the batter, there’s unmissable garlic flavour here!
Salt – Brings out the flavour in everything.
How to make Cheese and Garlic Quick Bread
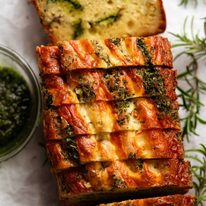
I like to wedge chunks of cheese in the batter and swirl through herb and garlic oil so you get lovely pockets of cheese and streaks of herby colour, and the lovely textured crust on top. But you could just mix the herb mixture and shredded cheese through the batter – even faster to prepare!!

Herb garlic mixture – Just put everything into a bowl and mix together. It should be dollop-able, so if it’s a little on the dry side just add a smidge more oil.
💡TIP: Instead of finely chopping the herbs with a knife, you can blitz it up with a stick blender. It makes it a bit finer and pesto-like so it is not quite as green once baked, but it works perfectly and is faster to make! Directions in recipe card notes.
Dry ingredients – Whisk the dry ingredients in a bowl.

Wet ingredients – Whisk the wet ingredients in a separate bowl.
Combine wet and dry – Make a well in the centre of the dry ingredients, pour the wet ingredients in and mix just until you can no longer see any flour. The batter will look a little lumpy and that’s totally fine. Don’t keep mixing to try to make it smooth – the lumps bake out and overmixing makes your loaf crumb less soft.

Cheese, herb and garlic – I like to do the herb and garlic swirls and cheese ribbons in 3 layers, using a 21 x 11 x 7 cm pan (8.3 x 4.5 x 2.75″) which makes a nice tall loaf.
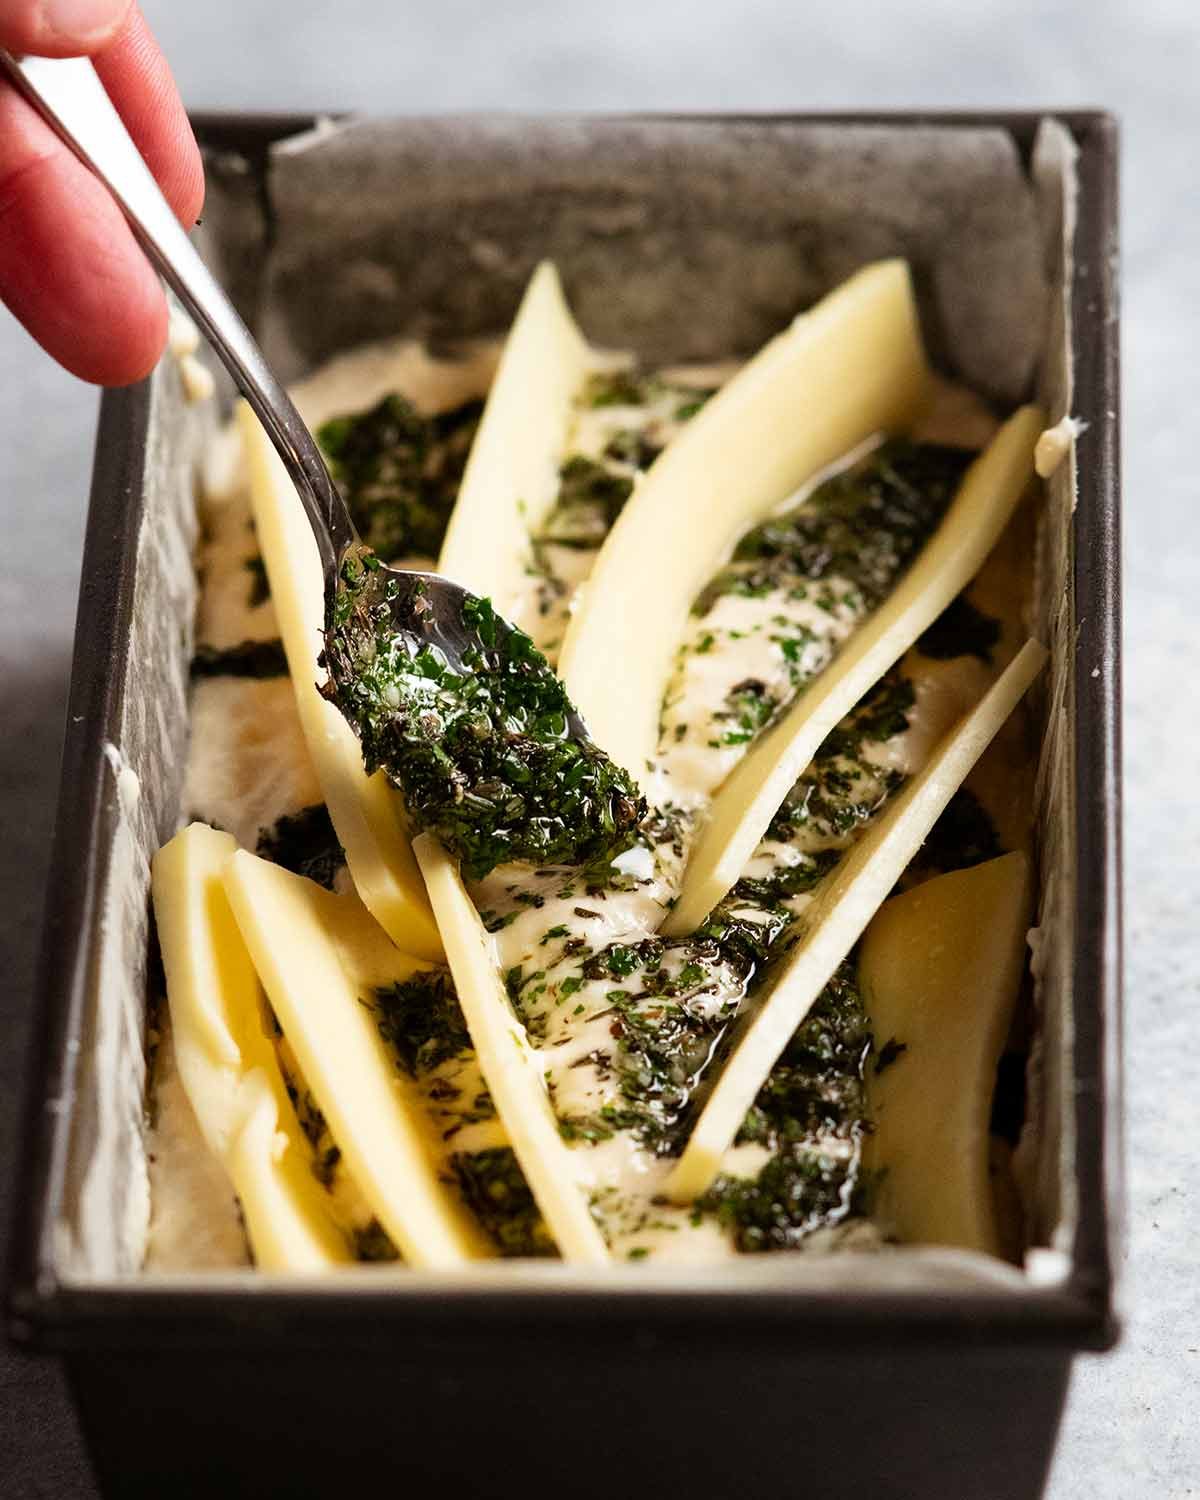
Spread 1/3 of the batter in the loaf tin. Dollop 1/3 of the herb garlic mixture over and randomly push in and drag the knife through – there are no rules or art about this. You could just spread the mixture across the surface. Then wedge the cheese slices in, upright, like pictured above, sticking out is fine.
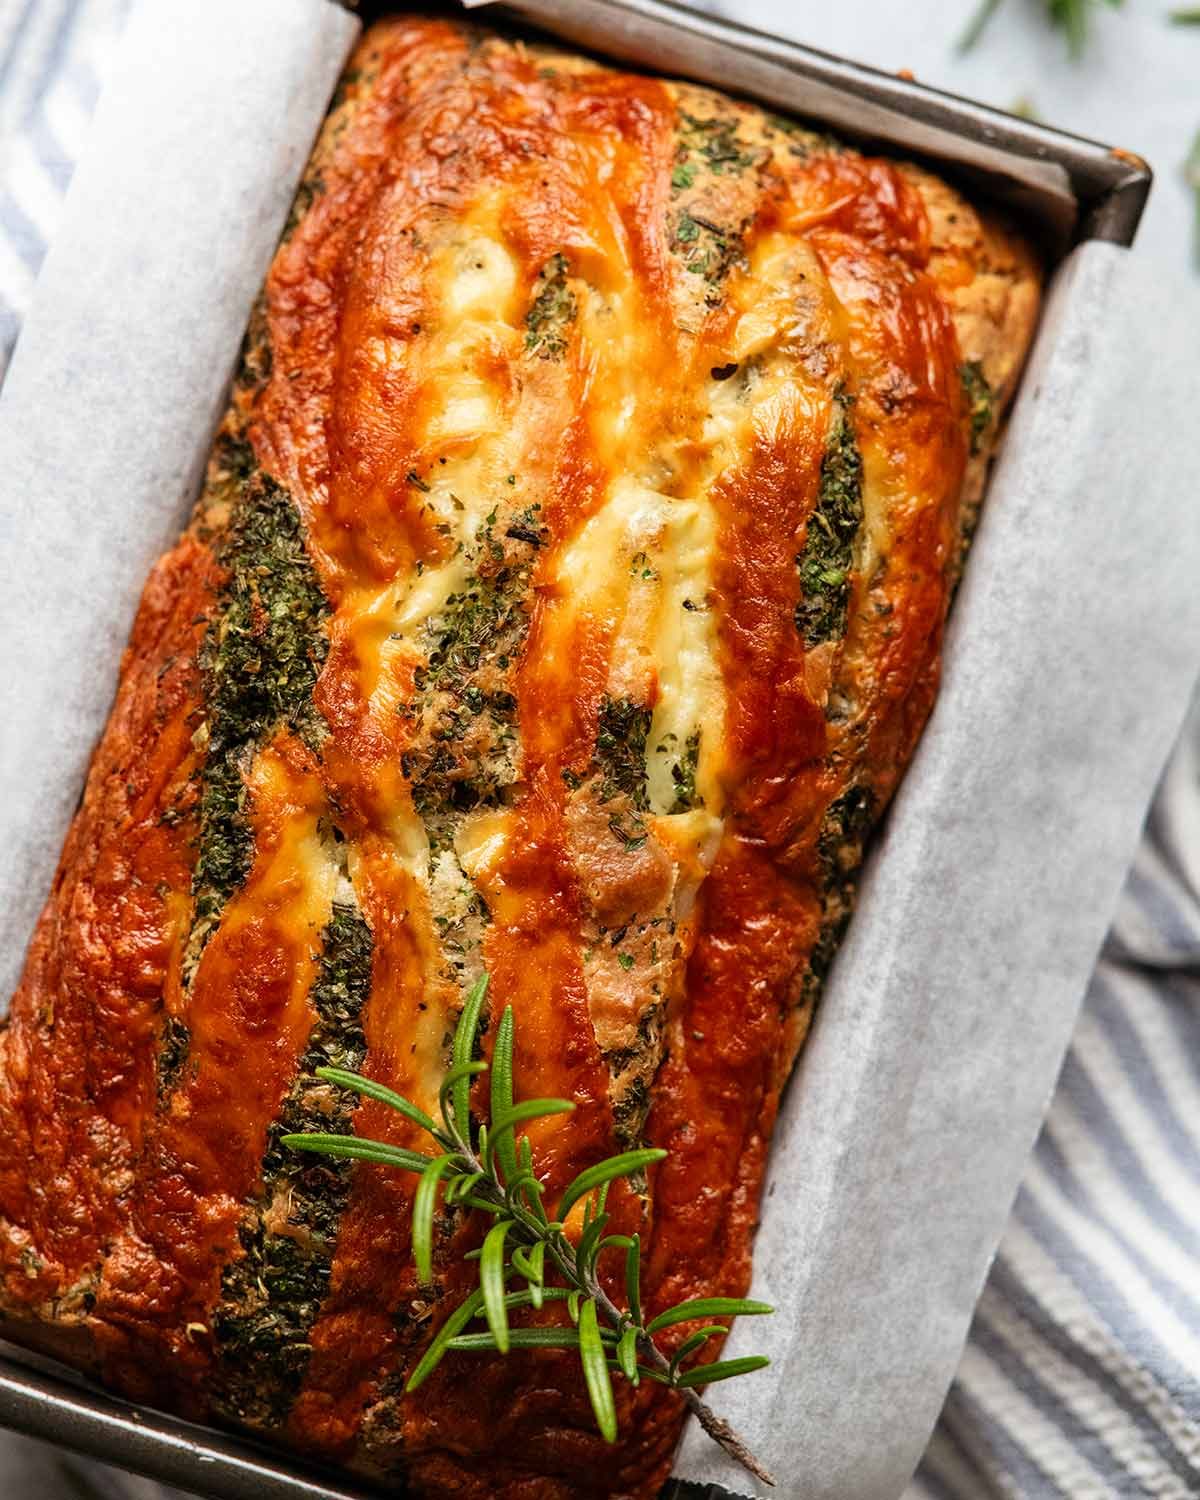
Then repeat this twice more. It’s fine for the cheese to be sticking out the top – makes the surface golden and cheese crusted!

Bake 30 minutes uncovered at 180°C/350°F (both fan-forced and standard ovens).
If you’re wondering why the temperature is the same for both types of ovens, because you’re used to seeing the fan oven temp 20°C lower – good question! Please see FAQ – too lengthy to explain there. 🙂

Bake covered 20 minutes – Remove from the oven and loosely cover with foil. Then bake for a further 20 minutes or until a skewer inserted into the middle comes out clean.
Cool 5 minutes in the loaf tin then at least 10 minutes on a rack before slicing (it’s very fragile when hot, straight out of the oven).
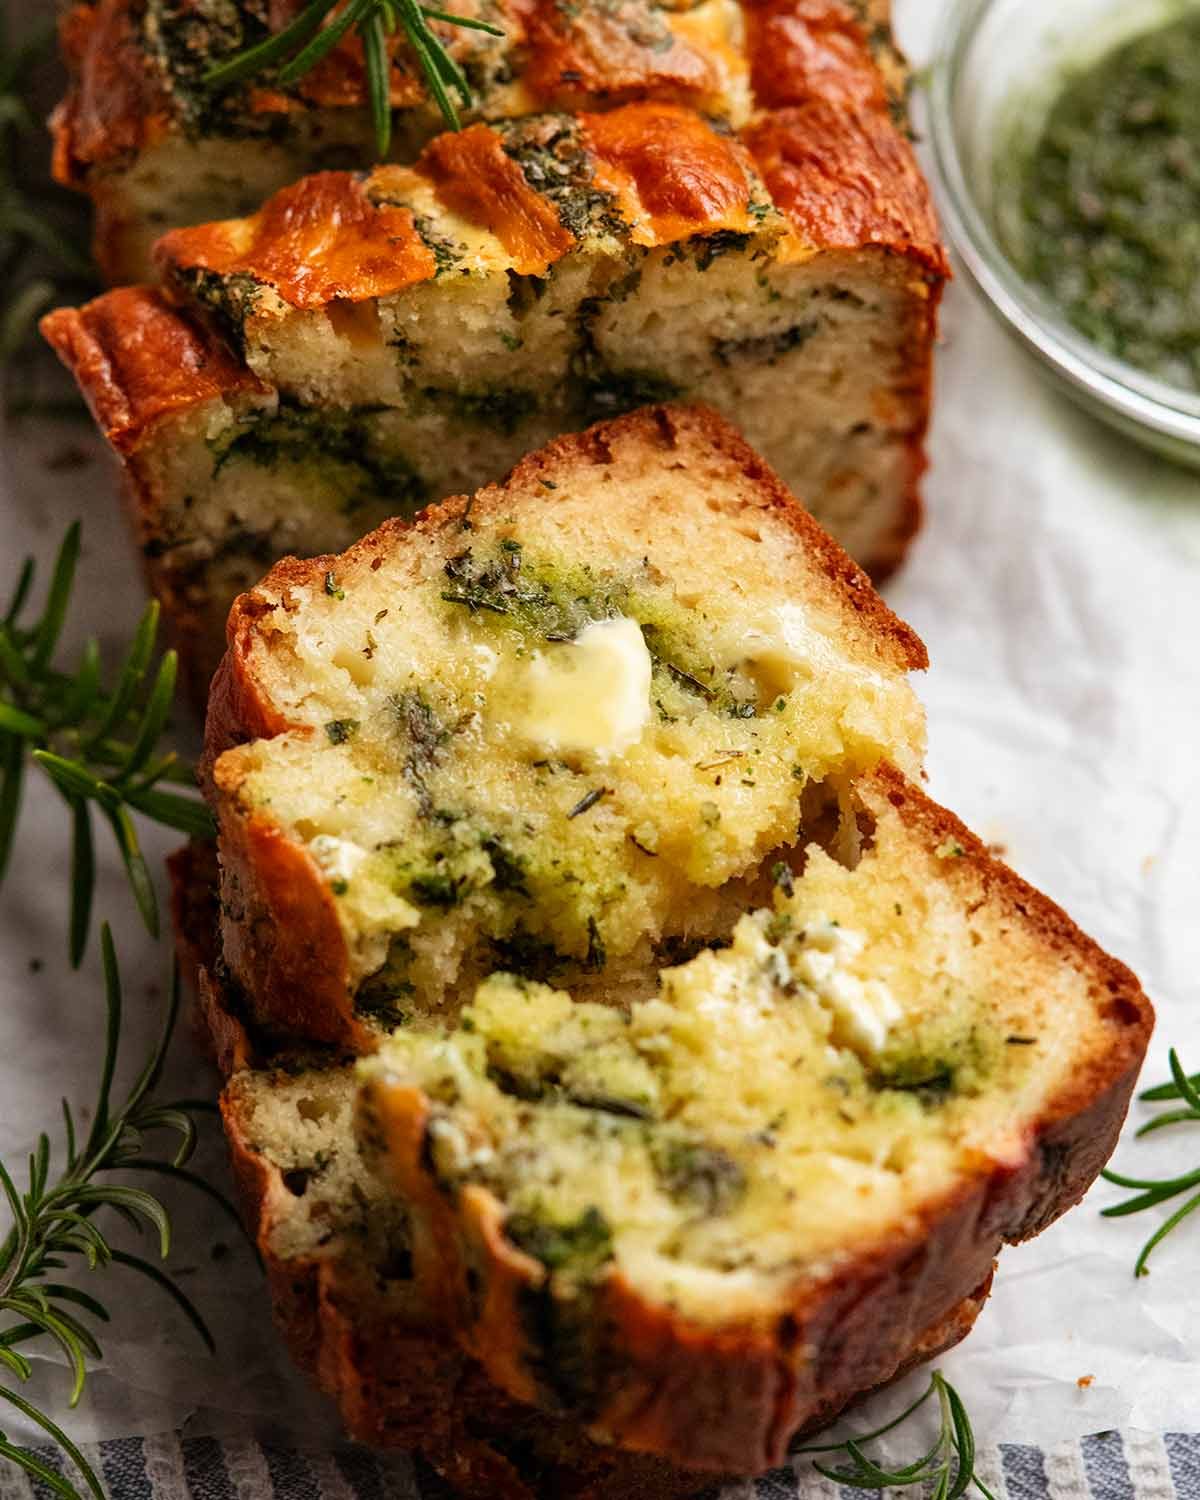
Butter isn’t needed.
But it’s always welcome.
Serve this for afternoon tea, take it to picnics, as a side for meals. It’s also fantastic for dipping into soups and slow cooked stews!
– Nagi x
PS It’s terrific eaten at room temperature but if you can get to it within the first couple of hours after taking it out of the oven and you do the pretend-optional-butter-slather, it may well be the best thing you eat all week.
FAQ
The original recipe published in 2015 included buttermilk. Over the years, as I’ve made this recipe for myself, I found myself tweaking it out of necessity because buttermilk is not a fridge staple for me.
Instead, I used a combination of yogurt and milk which are both fridge staples. Eventually, these became standard inclusions in loaf recipes like this, both sweet and savoury. Not just because of convenience because I always have the ingredients, but also because it makes a better loaf. The crumb comes out more soft and not only that, the loaf stays fresher for longer – 4 to 5 days, compared to 2 to 3 days with the buttermilk version.
I’m afraid I haven’t tried this with gluten-free flour. Sorry!
4 days in the pantry, then for day 5 and beyond, just lightly toast it to freshen it up.
Truthfully though, if I’m not enjoying this warm, freshly made, I pretty much always toast it!
The original recipe I published in 2015 was a recipe I already had that I had been making for myself over the years. Mind you, back then, I was only 1 year into this website so I still had plenty of recipes in my stash to dig into. These days, most recipes are brand new creations. 🙂
So, the original recipe didn’t require development. This new and improved version is one that evolved over the years as I was making this recipe for myself and I was tweaking it. Once I realise it had been a few years that I’d been keeping the improved version for myself, I realised it was time to share! 🙂
As this one was an existing recipe of mine, JB wasn’t involved in the development process. However, as with every recipe we publish, he made it independently to double check the recipe. Happy to report he enjoyed it!
Usually, the temperature for fan-forced ovens is 20°C lower than standard ovens. So, most of my recipes say to pre-heat ovens to 180°C for regular ovens or 160°C for fan-forced ovens. This is because the effect of the fan is that the heat in the oven is stronger and bakes things faster.
The best way to explain this is if you are wet on a cold day, you feel colder when the wind blows. Fans in ovens work the same – it makes things cook faster.
With this loaf though, perhaps because of the height and most of the cooking of the inside of the loaf is done when it is covered in foil, I found that it takes way longer at 160°C fan-forced than a 180°C standard oven. But when I increased the fan oven up to 180°C, it baked at the same time. This happens with some recipes, from time to time. 🙂 An anomaly, but it’s not unheard of!
Instead of chopping the fresh herbs with a knife, you can just blitz everything up with a stick blender. The herbs are chopped finer so the swirls/dollops are not quite as green once baked, but it works perfectly and is certainly faster!
To do this, put everything in a jug that is just big enough to fit the head of a stick blender. You’ll need 1/2 cup lightly packed parsley and 1/4 cup rosemary leaves. Don’t put garlic in whole, takes more effort to blitz than herbs so you’ll end up over blitzing the herbs into a green smoothie, so put it in grated or crushed with garlic press.
Then blitz until the herbs are finely chopped, but stop before you turn it into a green smoothie. You might need an extra tablespoon of oil to loosen the mixture up.
Watch how to make it
Hungry for more? Subscribe to my newsletter and follow along on Facebook, Pinterest and Instagram for all of the latest updates.
Cheese, Garlic and Herb Quick Bread (no yeast)
Ingredients
- 7 oz / 200g block of cheese (cheddar or tasty), cut into 3mm / 0.1" thick slices, different widths for random ribbons throughout! (Note 1)
Herb and garlic swirl
- 2 tbsp fresh rosemary , finely chopped
- 2 tbsp fresh parsley leaves , finely chopped
- 1 tsp dried oregano
- 1/2 tsp dried thyme
- 2 garlic cloves , crushed using garlic press or finely grated
- 3 tbsp extra virgin olive oil
- 1/2 tsp cooking salt / kosher salt (halve for fine table salt)
Dry Ingredients
- 2 1/4 cups plain flour (all-purpose flour)
- 1 tsp baking soda (bi-carbonate soda), sub 3 1/2 tsp baking powder
- 3/4 tsp cooking salt / kosher salt (halve for table salt)
Wet Ingredients
- 1/2 cup plain yogurt , Greek or regular (full fat, unsweetened)
- 3/4 cup milk , full fat best, low fat ok
- 2 large eggs (~50-55g/2oz each)
- 3 1/2 tbsp (50g) unsalted butter , melted
- 2 tbsp olive oil
- 2 small garlic cloves , crushed with garlic crusher or grated
Instructions
- Preheat oven to 180°C/350°F (both fan and standard ovens).
- Loaf tin – Grease a 21 x 11 x 7 cm loaf pan (8.3 x 4.5 x 2.75") lightly with butter or oil spray then line with baking paper (parchment paper). (Note 3)
- Herb and garlic swirl – Mix the ingredients in a small bowl, it should be a thick dollop-able mixture.
- Dry ingredients – Whisk the Dry Ingredients in a bowl.
- Wet ingredients – Whisk the wet ingredients in a separate bowl.
- Combine – Make a well in the centre of the Dry Ingredients. Pour the Wet Ingredients in and mix until just combined.
- Swirls and cheese Layer 1 – Pour 1/3 of the batter into the bread tin. Dollop 1/3 of the herbs across the top then use a knife to "swirl" it into the batter up and down, and also turning the batter over (refer photo below). Use 1/3 of the cheese slices and push them randomly into the batter. Push some all the way in and leave some poking out of the batter.
- Layers 2 and 3 – Repeat twice more. Don't worry about herb mixture exposed and cheese slices sticking out the surface, looks amazing when baked!
- Bake for 30 minutes, or until the top is golden. Remove from oven and cover with foil, then bake for a further 20 minutes (total baking time 50 minutes). Check to make sure the centre is cooked by inserting a skewer – it should come out clean.
- Cool in the loaf tin for 5 minutes then turn the bread out onto a cooling rack. Allow to cool for at least another 10 minutes before cutting thick slices. Butter is optional but always welcome!
Recipe Notes:
Nutrition Information:
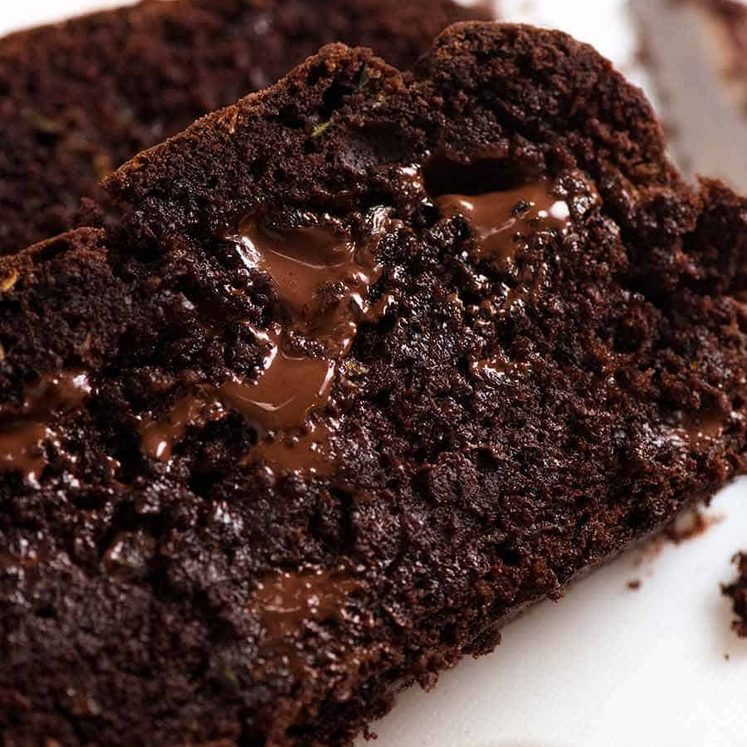
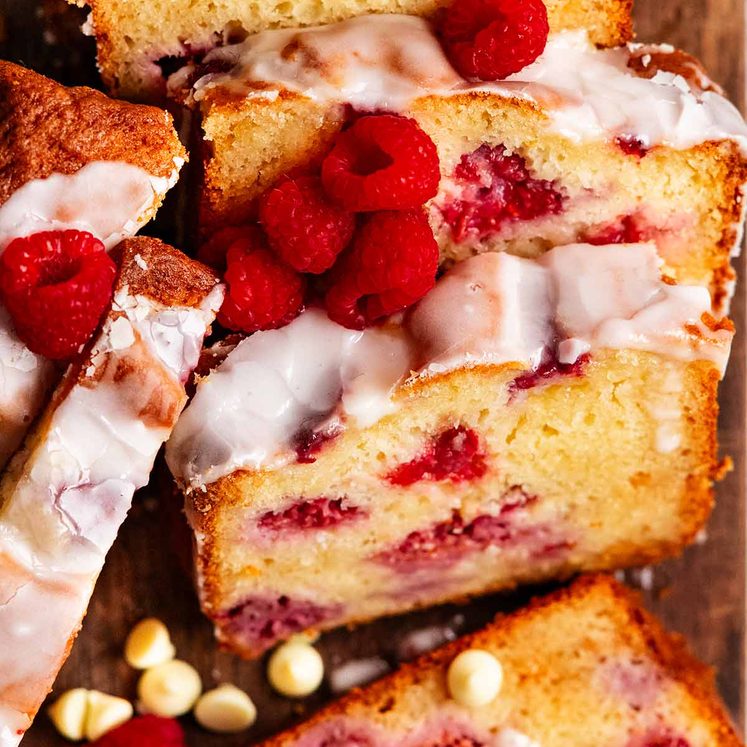
More quick loaf breads like this


Life of Dozer
Very large dog under a wobbly tripod with a very expensive camera. What could go wrong??😅

This was early today, in the shoot room. Filming and photographing a sparkling new recipe for next week! Dozer doesn’t realise yet that it’s vegetarian. 😂

I just made it. I changed the butter milk for NATURAL YOGURT….i hope it works. 🙂
What did you think? 😉
Hello from Wisconsin!
Just wanted to let you know that I made the No Yeast Cheese, Garlic and Herb Bread last night. I had buttermilk in the refrigerator that needed to be used up and was so happy that I came across this recipe on your blog. Absolutely the best no yeast bread I’ve had. My husband and I enjoyed with homemade bean soup last night. Thank you for the wonderful recipe! Have a great day:)
Ooooh, yay!!! I’m so glad you enjoyed this Pam, thank you for letting me know! Have a wonderful weekend! – Nagi, all the way from SYDNEY!!!!
YES please! I love bread! My husband and I always finish all the bread when we go to restaurants. Awesome that this bread has cheese and garlic. Most importantly, no yeast! Going to try it!
I swear, the bread basket is my favourite thing!! Especially at really posh restaurants 🙂
Dear Nagi,
I have been following and using your recipes for some time, with much pleasure. I can’t eat gluten and wonder if you have tried applying your hugely imaginative skills to this area. Someone needs to come up with decent bread for those of us who love it, but can’t enjoy the normal kind. Would that genius be you? If you need an incentive…..,you’ll make a fortune if you get it right! The standard joke among coeliacs and the gluten intolerant is “which tastes better? The GF bread or the packaging?
Hoping you can help.
Kathy
Hi Kathy….not an area I’ve put my mind too unfortunately!! A good friend of mine is gluten free and struggles as well. 🙁 Maybe one day soon!!! Who knows! I do have a Gluten Free category on my site though – have you seen it??
Many thanks.
Hi Nagi,
It looks delicious! do you think I can freeze it?
Thanks a lot!
Hi Vivian! Yep, you sure can. I made this 3 times for this post and I froze the leftovers! 🙂 Hope you love it!
Oh, short people problems! I’m totally hearing you on that. This bread sounds like a winner (and yes, well justified in slicing off the top for the chef!) 🙂
I know, right? We got the “short end” (ha ha!) of the genetic stick. Can you think of any benefit of being short? So unfair!! 😉
Nagi !my mum was only 5’2 and she always said she could lay flat in the bath and everything was wet together!
BTW Bread look great 🙂
I understand your cooking stilettos perfectly. I have a pair of “closet shoes”—very tall wedges that I could not possibly walk in but that allow me to reach higher shelves.
Thank you for all of your wonderful recipes, Nagi. My family has been the lucky tasters of many of them!
Hi Patti! I burst out into laughter reading about your “closet” wedges – that is legendary!!! And it makes absolute perfect sense – so much easier than dragging a stepladder! I love it, just love it 🙂 Thank you for your lovely message about my recipes, and I think your family is lucky to have you to cook amazing food for them!! I hope you are having a wonderful weekend – N x
I, also, am vertically challenged. On a good day, in my 30’s I was 5’2″ Now in my middle 80’s, I barely reach 5′. I usually do everything in the kitchen sink. I find the depth is just perfect for kneading, grating and mixing. Plus, all the mess is already in the sink for cleanup. Your recipes are all so delicious and it is interesting that you are in the other half of the world. Like another commentator, The only place I felt tall was in Japan, where I seemed to tower over everyone. Thank you for all your delicious offerings.
Hi Angela! That is a cracker – what a tip – kneading etc in the sink!!! It makes perfect sense and as you say, practical. If I ever renovate my kitchen, I might have to get an extra giant sink installed so I have plenty of space to work in it!! I bet you stood out in Japan, that’s for sure 🙂 Handy for seeing OVER the crowds!!!
Wearing hoochie mama stilettos to knead bread is brilliant. I love this quick and easy no knead, no rising and no fuss recipe. For the first time in my life I am actually average height. I feel quite tall living here in Hong Kong but my teenage boys of upward of 6 foot 2 tower over everyone. It is super handy when it is super busy and crowded in one of the most busiest cities in the world, I can find them anywhere…
OMG, I literally burst out into laughter!!! It is SO TRUE, I feel normal height anywhere in Asia. The vision of your sons towering over crowds….I tell you, that’s handy, you will NEVER lose them in crowds!!! (PS Must be fun shopping for clothes!)
I have that same problem!!! I’m short too so this recipe is right up my ally and it sounds so delicious 🙂
Ha ha ha!! I am SO GLAD I have company in that area!! N x
Yum, I could go for a slice of this bread right about now! Looks delicious and love all the herbs running through it!
Thanks Sabrina! Hope you’re having a great weekend!
Love the look of this and it shall be made this weekend. Tomorrow big cook day and I recently bought a small commercial pizza oven so breads will be made but they do take time. This can bake while I make something to mop up with it.
I use an Annabel Langbein bread for Busy People recipe, which is quick but yeasted.
I love your recipes. Thank you.
Hi Jill! I’m so glad you enjoy my recipes, thank you very much for leaving a comment to let me know! I do hope you enjoy this, and I’ll certainly be looking up this recipe by Annabel! 🙂
I lurve cheese – cut me open and my veins run thick with Brie – and I adore a quick bread so this gets two thumbs up from me.
Ba ha ha! You and me BOTH!! 🙂
Looks yummy, Nagi; I will make it soon! I’ve had great success with no-knead bread recipes based on the Artisan Bread in 5 MInutes series. You mix it in the stand mixer, let it sit at room temperature for two hours, then put it i the refrigerator overnight or longer. I’ll be making challah using that recipe next weekend for Rosh Hashanah, the Jewish New Year. The texture is wonderful; my braiding technique still needs practice, however!
My braiding is non existent!! Actually, I do enjoy making my own sourdough which needs no kneading, not even a stand mixer! I was amazed when I first discovered it!!
You have garlic in the name of this bread, but I don’t see it in the recipe?
Hi Barb! Gosh, how silly of me 🙂 I just corrected the recipe – just add 2 small minced cloves in with the Wet Ingredients!
What is “tasty” cheese? To me, nearly all cheeses are tasty! :^)
Hi Barb! Two fixes needed! 😉 Thank you for your questions! Tasty cheese is like Cheddar cheese, gouda, gruyere – a firm cheese. It’s really good value here in Australia. Any melting cheese can be used! I’ll update the recipe. Thanks again for your help Barb! N x
Glad to help! And it’s so interesting to learn the different terminology in foods/cooking among various countries.
Well you know how I feel about bread and cheese 😉 I actually love kneading bread – I find it therapeutic in a way. Although, I suppose the ease of kneading for me may have something to do with my giant ‘man-hands’ 😛
I’ve never tried baking bread with no yeast – it looks so light an airy! Can’t wait to give it a try!
Well of course. With your giant hands, kneading silky smooth dough must be a BREEZE. So jealous. Dozer’s paws are almost as big as my hands. That’s how small they are!
Hi Nagi! I am not seeing anything about how much garlic and when to add it to the mixture in your recipe.
I would love to make this – it sounds wonderful!!!
Please post how much garlic and when to add it.
Thank!
Teri
Hi Teri! I clearly had a brain implosion – I cannot believe I forgot that!! 2 small minced garlic cloves gets added with the Wet ingredients. 🙂 I just updated the recipe. So sorry! And thank you for picking up the omission!! N x
This is just what I need now. But where does the garlic go in?
Hi Bea! I’m so silly, can’t believe I forgot that – DUH!! 2 small garlic cloves, minced, gets mixed in with the wet ingredients. 🙂 I just added it to the recipe. Sorry!! N x
What a great way to use up my last herbs in my garden! I am vertically challenged as well and it doesn’t get better as we age…but ya know what works? Big hair girlfriend…will add at least 2 inches if you get it right 🙂
OMG!! I burst out into laughter!! OK. So I’m thinking I might do an 80’s style teased up fringe? Definitely will add 2 inches!!
Although I love making my own bread, I was looking for a quick and easy recipe with no yeast in! I will definitely be trying yours. x
I know you love making bread Mel!! But you’re right, it is handy to have a quick version up your sleeve! 🙂